Pages

Monday, June 6, 2011

Death Star Pinata

May the Force be with you!
You will need:
  • One round balloon
  • Newspaper, cut into small(ish) pieces
  • 1/4 cup Flour
  • 1/2 cup Water
  • Gray tissue paper, cut into small(ish) pieces
  • String
  • Painter's tape
  • Glitter
  • Bag of candy
  • Glue
  • Paintbrush
  • Duct tape
How to:
  1. Inflate balloon, close off. Tie string to end and hang over work surface so that it hangs at a good working level. (We tied ours to the ceiling fan.)
  2. Mix together flour and water to form paste. (As a note, you will need more paste during the whole process, but I would make it in small batches. The 1/4c flour to 1/2c water ratio is what we used each time. We needed two batches total.)
  3. Dip newspaper pieces into paste and place on balloon, overlapping pieces, until entire balloon is covered.
  4. Applying the first layer.
  5. Repeat with tissue paper until newsprint can no longer be seen through tissue. (About two layers) Let dry. (For older kids you may want to add a few more layers to make it a little harder to break open. For a group of 5 four year olds, two layers was perfect.)
  6. The top half has the first layer of tissue paper.
    After two layers, you can still see a bit of the newspaper print, but once dried it disappeared.
  7. Use painter's tape to paint the Death Star's grid marks. (No one will care if it isn't perfect.)
  8. Mix small amount of glue and water together. Using paintbrush, "paint" mixture over balloon. Immediately sprinkle with glitter.
  9. When balloon is completely dry, pop balloon and carefully pull deflated balloon out. (Listen for the wicked cool noises it makes as the balloon rips away from the dried paper.)
  10. Carefully pull away painter's tape.
  11. Cut a hole (to make the Death Star's satellite grid) near the top of the Death Star. Save cut out.
  12. Fill with candy.
  13. Elliott's favorite part!
  14. Reinforce top of Death Star (where string will be placed) with duct tape to make pinata more sturdy. Knot one end of long string and thread it out of top of pinata. (Make string long enough to be able to hang it from a tree.)
  15. Glue a few pieces of tissue paper on to back side of cut out. Invert, and place back over hole. Secure with tape.
  16. Hang from tree branch and attack!
Thoughts:
OK, confession. Originally I bought a Darth Vader pinata because I thought it would just be easier. But after getting it home and looking at the receipt ($25!!) I quickly returned it and convinced Elliott we were making a pinata instead. Most of the supplies were things we already had around the house, so the only expense, besides the candy which we would've had to purchase with the store bought pinata as well, was the gray tissue paper, which I found at Target for $2.99 for 10 sheets. (We only used two.) Making the total cost for this craft 58 cents. (Again, not counting cost of candy.)

If you have the time (Give yourself at least three days!) and the desire, make your own pinata!

This was a lot of fun to make, although we made several mistakes along the way. I wasn't crazy about the way the grids turned out, but Elliott thought it looked amazing. Our pinata was a little too weak at the top end, so when we filled it with candy it promptly crashed to the ground. (yet survived!) The hole cut out wouldn't stick and disappeared seconds before I hung the pinata. The string I put in to hold it up kept tearing right through the paper. The duct tape helped, but in the end, it was just too heavy to hang on it's own and I had to hold it up while the kids went at it.

Still, what a hit! (Ha! Ha!) The kids were Jedi's, attacking the Death Star with their light sabers (see future craft coming soon) and they loved it. I was afraid the pinata would break before everyone had a chance to go at it, so I had told the kids they would get one whack each. But they were all so excited they swarmed around eagerly and, in unison, like a planned attack from the Rebel Alliance began whacking away. An army of Storm Troopers couldn't have stopped them. I can't believe no one got hit in the face!

Alas, the Death Star didn't stand a chance. Within a minute the Rebels had it defeated and destroyed. By far, my favorite part from the party! And yes, I am well aware that I forgot to take a finished picture! Trust me: it was pure awesomeness!


Elliott's Evaluation:
It was good. I liked putting the candy in. I loved breaking it because everybody joined in. It was very fun. I liked making the whole Death Star pinata. I liked making a hole in the Death Star pinata. Now, this is the last thing I have to say: I liked putting the glitter on. I have more to say: I liked putting the glue on and I liked breaking it. I was trying to bat at it so it would break all the way. Gravity made all the candy fall out when it broke.

From Me:
And that my friends, is an awesome review.

Thursday, May 26, 2011

Fluffy Sheep

After taking a two week hiatus for Elliott's birthday party preparations, I'm baa-ck!

Make these fluffy sheep from recycled materials.

You will need:
  • Toilet paper roll, cut in half
  • Handful of cotton balls, cut into quarters
  • Glue
  • Black felt
  • Googly eyes
  • Black pom-pom (one per sheep)
  • 4 Black pipe cleaners, cut in half
How to:
  1. Cover toilet paper roll with glue.
  2. 
    Don't come to my house unless you want to work! I make my friends pitch in!
    
  3. Cover roll with cotton balls.
  4. Cut sheep's head out of black felt. Attach googly eyes. Glue to roll.
  5. Glue black pom-pom to sheep's butt.
  6. Twist pipe cleaners into spirals. (I twisted ours around a pencil.) Attach to roll to form legs. (I punched holes into the roll and poked the legs through.)
Thoughts:
You never know how craft time during a play date is going to go, so I tried to find an easy, short craft so the boys could get back to playing. This was pretty lame, but Elliott and Christian seemed to have fun making them. Of course Elliott decided it might be fun to glue cotton balls to his fingers, too...

Elliott's Evaluation:
I liked to glue the balls on. My sheep has a butt!

And because El thought his sheep needed a buddy, I let him do one on his own while I cleaned up...

Saturday, May 7, 2011

Acorn Jewel Caps


Turn acorns into a work of art!

You will need:
  • Acorn caps (try to get the larger, flat ones)
  • Markers
  • Glue
  • Rice
How to:
My sister lives in a state where there is no abundance of acorns so I once sent her a small bag full of them to use for crafts. When she opened the bag it was crawling with what she thought were maggots. Ewwww, so gross. I have since found out that they weren't maggots, but weevils, nasty looking larvae that eat the nut inside. They live in the nut during the winter and can sense when the weather is warmer and will come out then. (Hence them coming out while being shipped cross country in a nice warm box.) I get the heebie-jeebies just thinking about them now. Point being, if you're going to do any crafts with acorns, I suggest you follow step one first!

  1. Clean  acorn caps of any dirt and debris. Place acorns on baking sheet and cook at low setting (I did 200 degrees.) for about 40 minutes. This will kill any weevils that are lurking in your acorns. Do weevils live in the caps as well? I have no idea, but I was certainly not interested in finding out.
  2. Sprinkle a shallow layer of rice on to a plate or pan. (Just enough to give the acorn caps a sturdy place to stand while drying.)
  3. Completely color the inside of acorn cap with marker. Place upright on plate of rice.
  4. Fill to the rim of cap with glue.
  5. Let dry. (Ours took about 3 full days to dry.)
Thoughts:
Totally stole this idea from: http://homemadeserenity.blogspot.com/ a blog that makes me want to own my own chickens. So cute! (the acorns and her blog!) Elliott didn't really have the patience to color in each cap; I had to go behind him and make sure they were filled in. But he totally looooved filling the caps up with glue. Loved it. Couldn't get enough of it. Would probably still be filling acorn caps with glue. Would probably carry glue with him on walks so he could fill stray caps, given the choice.

Me? I thought this was crazy cute. Who would've thought glue would dry into a shiny, glossy color like that? Once you fill the caps up, you have no idea what the color underneath is, but after a few hours the colors start to leak into the edges a bit. We had fun trying to guess what the color was going to be. For three days (several times daily) we would go check on the acorns to see if they had hardened enough. Once it does, the color shines through.

As cute as they are though, we haven't done anything with them. The above blog mentioned using them as a matching game, which is a great idea, but we only used a few colors, so that wouldn't work for us. Still, lots of fun to make.

Elliott's Evaluation:
I liked putting the glue in. I balanced the acorns so I didn't get any glue out. I liked waiting for it to dry and trying to see the colors. I'm waiting to play Matching games with it.

Sunday, May 1, 2011

Napkin Rings


May the 4th is National Star Wars Day! Use your Jedi skills to make some galactic crafts worthy of any planet in the solar system. May the 4th be with you!
 

Make dinnertime more fun with these super nerdy napkin rings!

You will need:
  • Felt sheets in several different colors
  • Felt glue
  • Small googly eyes
  • Velcro, cut into small 1/2 inch pieces
  • Needle and thread
How to:
  1. Before you start make some simple sketches of the characters you want to make. Keep in mind that the patterns should be very simple and that the pieces will be very small.
  2. Cut long strips of different colors of felt to form the napkin ring. (Ours were about 2 inches wide by 8 inches long.) Set aside.
  3. 
    The napkin rings with Velcro tabs aligned to each other.
     
    
  4. Cut small squares just slightly smaller than the width of the napkin rings. This is what your character will be placed on.
  5.  
    Pieces of Yoda on his square. I would give this to Elliott and he would have to figure out how to turn it into the character.

    Pieces of Jabba

     
  6. Cut pieces out for each character that you are making. Remember to keep the pieces small and to check to make sure it will fit on your square. 
  7. Once all the parts for your character are cut, assemble them and secure onto square with felt glue. Use googly eyes for eyes. Glue square onto napkin ring. Let dry.

    6.    Using needle and thread, sew Velcro tabs onto napkin ring, checking to make sure they'll line up with each other. (FYI: I used  felt glue to secure the Velcro and it didn't last. I went back and sewed each piece on. A pain, but much more secure.)
    7.    Wrap napkin ring around your silverware setting and eat up!


R2D2


Ewok


Princess Leia


Yoda


Admiral Ackbar

C3PO
Thoughts:
Talk about using your imagination! It was so much fun to talk about which Star Wars characters we would make. (R2D2 and C3PO were a given since they are Elliott's favorites.) We literally spent days trying to decide and figure out how we would make them. Check out http://www.starwars.com/kids/do/crafts/napkinrings.html for some inspiration or come up with some ideas of your own. (We did a little of both.)

This was my first time using felt glue and it is my new best friend. It dried much quicker than regular fabric glue and worked great! I highly recommend it if you do this craft (or any craft with felt).

The smaller pieces were a pretty big challenge for Elliott, but surprisingly he didn't seem to mind so much because he was having such a good time trying to assemble the parts to see how the character would go together. (I cut the pieces before we started and placed each character inside it's own bag. I let Elliott choose who we would work on and he had to figure out how to put them together.) He loved it! We use these napkin rings every single meal, alternating which character we use. (Although El hasn't ventured away from R2 or 3PO.) And of course we plan on a special Star Wars dinner on May 4th:
Jabba the Hutt dogs (crescent dogs)
C3PeaOs
Vader Taters (tater tots)
Jawa Juice
Wookie Cookies
Happy crafting and May the Force be with You!


Jedi Elliott's Evaluation: I liked putting the characters together. It was like a puzzle. I liked putting all the pieces on. I use my napkin rings every day! I liked putting all of them together. We made R2D2, C3PO, General Ackbar (FYI: that's Admiral Ackbar, but no amount of correcting will convince Elliott he isn't a General), Yoda, Princess Leia, and an Ewok. Is there anyone else? And Jabba. OK! He's an Admiral! Admiral Ackbar!!


Friday, April 22, 2011

Glass Magnets


Glass magnets with our favorite Star Wars guys!

You will need:
  • Clear glass stones (You'll find them in the floral section of the craft store.)
  • Magnets (Use the appropriate size for your glass. If you use a too-small magnet the glass will just drag it right off the fridge!)
  • Images of your favorite characters. (Is anyone surprised we used these adorkable Star Wars ones we found online?)
  • Mod Podge
  • Craft stick/Popsicle stick
  • Paintbrush (if using an ink printer for your images)
How to:
  1. Unless you are using a laser printer, you will need to "quick-finish" your images before starting this craft. Don't be alarmed, it's very simple! Just place a few drops of Mod Podge on your paint brush and very quickly brush a light layer over your prints. Let dry. (About 15 minutes)  Repeat on back side. This will give your pictures a shiny coat of protection that will prevent them from leaking and fading. (I actually painted a few layers on each side for an extra seal.) Trust me...don't skip this step!
  2. Place stones over each image and trace around it. Cut image out.
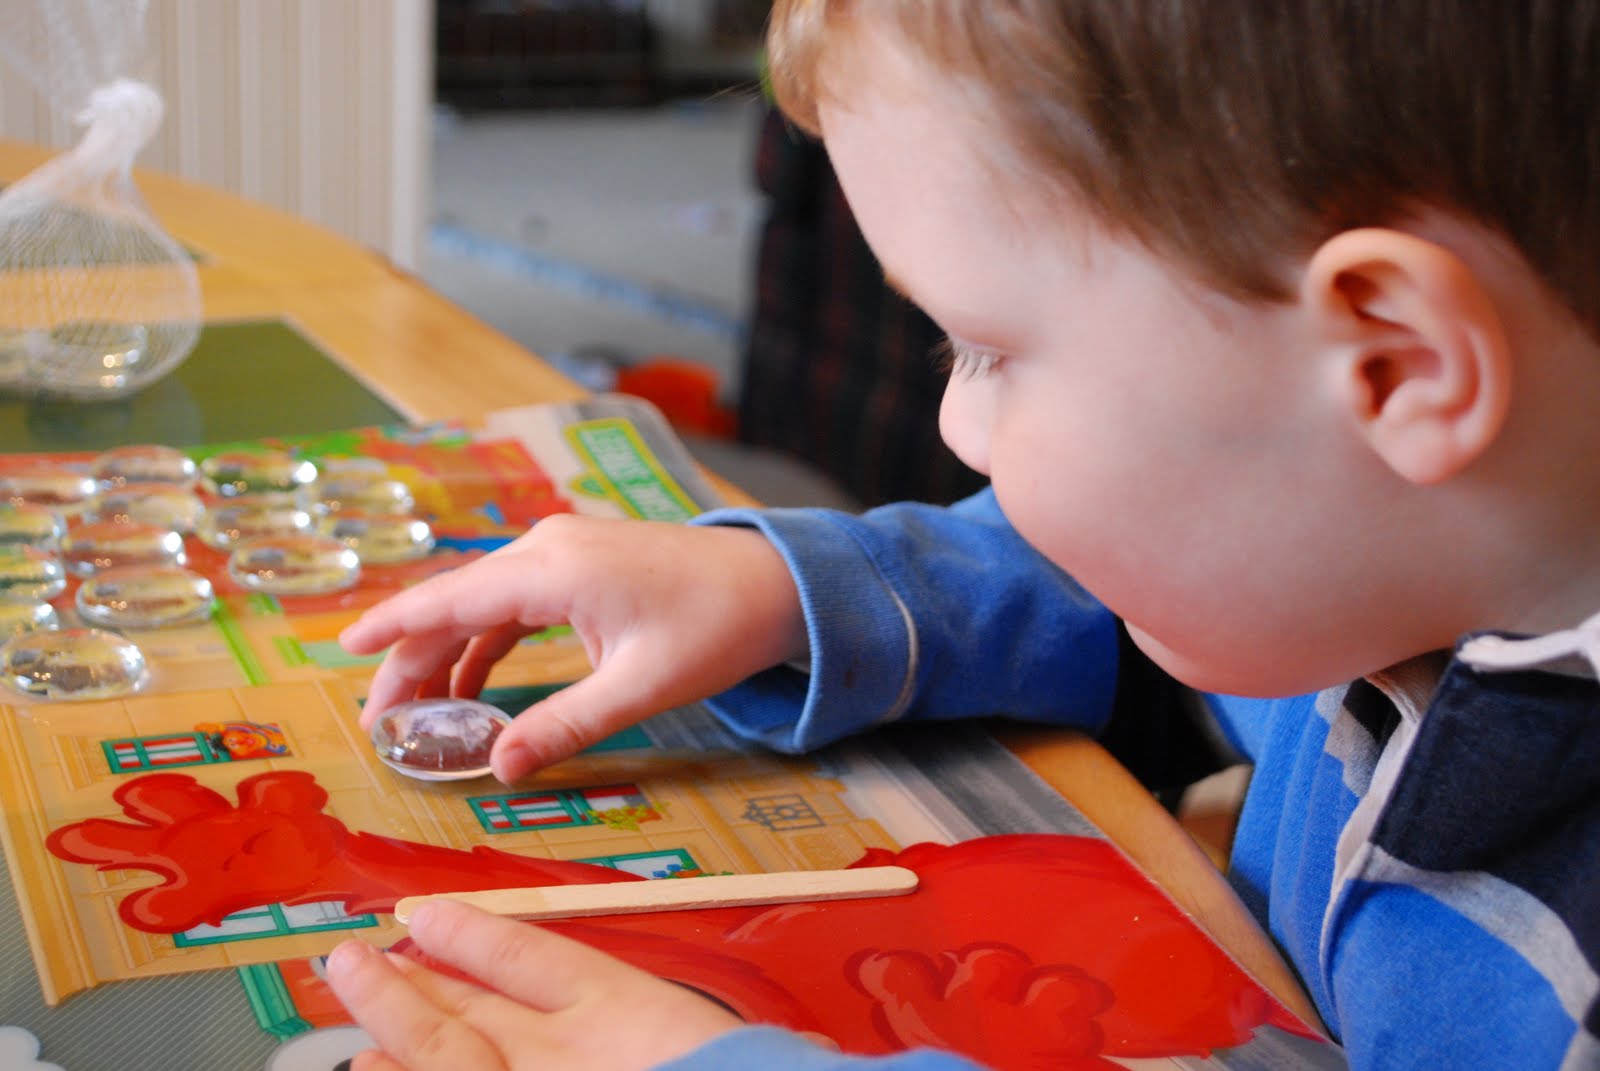
  3. Place a few drops of Mod Podge on craft stick and rub on to flat side of stone. Place stone over image. (You should be able to see the image through the stone. Press gently, but firmly to remove any air bubbles.
  4. Place a few more drops of Mod Podge on magnet and place glass on magnet. Press firmly. Let dry.
  5. Trim any excess paper from edges. Repair any peeling pieces with a bit more Mod Podge.
  6. Cool tip: Paint the back of your magnet with clear nail polish to prevent it from marking your fridge.
Thoughts:
Where did we get the idea for this super awesome craft? http://www.starwars.com/ Check out their Kid's Crafting Blog if your little one is into Star Wars!

Love it!! What a cool craft and it was fun to do. Elliott's obsession with Star Wars is reaching the, well, obsession phase and why not go with it? (Oh, and by the way, be prepared for many more upcoming Star Wars crafts. We have a birthday coming up next month and I bet everyone knows the theme!) These magnets are so flippin' awesome. They look like something you'd pay good money for. Our first go round I didn't use the "quick-finish" method and an hour after doing them, the images had faded so much you could barely tell what they were supposed to be. Lesson learned.

Elliott got a bit bored with the glue, so I eventually had to take that part over, but he was totally into deciding which character we were doing next. And there was a method, believe me! "Right after Han you have to do Chewie, because they are best friends. And then you better do Leia because Han loves her. And then the Ewoks because Leia is friends with them..."

Elliott LOVES these magnets and plays with them every. Single. Day. Seriously. His favorite pastime is to sit at the kitchen table with all the magnets face down and I have to call out a character for him to locate. Or I have to call out which character he has to put back on the fridge. Or he'll pull the characters off and match them with the action figures that he has. Or divide them into groups of dark side/light side, droid/human, Jedi/alien, bad guy/good guy. He has found so many different things to do with these magnets that this will probably become one of the best crafts we have ever made!

Elliott's Evaluation: I loved doing it! Doing the mod podge was kind of boring, but I REALLY liked picking which character we were going to do next!

Saturday, April 16, 2011

Color Wheel Banner


You will need:
  • Thin cardboard (We used a cereal box.) cut into circles
  • Magazines
  • Glue, slightly watered down
  • Paintbrush
  • Yarn
  • Hole punch
How to:
  1. Decide what colors you are going to do for your banner. Leaf through magazines and tear out any pages that contain those colors. Tear those pages into smaller pieces and keep colors separated. (I found the best luck in an old issue of Birds and Blooms magazine. There were tons of nature, bird, and flower pictures to choose from.)
  2. Using paintbrush, paint a thin layer of glue on to cardboard. Lay pieces of paper from one color pile on cardboard, layering and reapplying glue as needed. When completely covered, set aside to dry.
  3. Repeat with remaining color piles.
  4. Once dry, trim any hanging pieces of paper off edges of circles.
  5. Punch two holes at top of each circle, thread yarn through holes and hang.
Thoughts:
Elliott loved looking through the magazines for his colors and tearing them out. We probably could have made this a two day project and focused just on the tearing the first day. (I would recommend it. The tearing actually takes longer than you think it will.) Both of us liked "painting" the paper on.

Cute, but what do you do with it?

The banner is really cute, but I really haven't found a place for it yet. First we hung it in a window, but the sun blocked us from seeing the bright colors. I moved it to a shelf, but it's just hanging there. Elliott's not willing to part with it yet, so it'll remain there for a while longer.

Elliott's Evaluation: I liked tearing the magazines. First we put the glue on and then we put the paper on. It was just for a decoration. It's a good decoration.

Friday, April 8, 2011

Spring Robin


Make a Spring Robin with your foot!
 You will need:
  • White paper
  • Brown, orange and green paint
  • Paintbrush
  • Black marker or crayon
  • One clean, bare foot
  • Baking sheet (to contain any messes)
How to:
  1. Place paper on baking sheet.
  2. Paint bottom of child's foot with brown paint. Help child to step on paper. (You'll probably have to fill in some areas with more paint.)
  3. Paint an orange belly on Robin. (Since Elliott hasn't quite mastered coloring in lines, I painted a quick line to give him an idea of the area to fill in.) Add a beak.
  4. Add some grass. (And flowers if you want...we aren't that advanced.)
  5. Once paint is dry, add feet and an eye with the marker.
Thoughts:
I found this idea at http://www.momentsofmommyhood.com/ and I'm so glad I did. This Robin is so freaking cute and makes me smile every time I pass it. The craft is really easy and only takes a couple of minutes, so it's a great one if you're a bit pressed for time.

Elliott loved getting his foot painted and has already requested that we make a few more of these and I will be happy to do so. What a sweet craft!

Elliott's Evaluation:
It tickled when Mommy painted my feet! I like to hold my painting up in the window for the birds outside to see. But I don't want to scare them so I stay quiet. We are going to make some more of these.