Pages

Friday, December 31, 2010

Christmas Rice Wreaths


Our 2010 homemade Christmas ornament
 You will need:
(These measurements will make three 4-inch wreaths.)
  • One cup uncooked, white rice
  • 1/2 cup white glue
  • Green food coloring
  • Three bobby pins, bent open to slightly less than a 90 degree angle
  • Butter tub lids (one for each wreath)
  • Red construction paper
  • Hole punch
  • Red yarn
How to:
  1. Pour glue into a plastic bowl. Add food coloring to desired color. (We used about 7 drops each batch.) Stir well.
  2. Pour in rice and stir until all rice is coated.
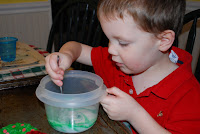
  3. Elliott uses his finger to start the wreath's middle.
  4. Scoop heaping spoonfuls of rice mixture onto each butter tub lid. Mold into wreath shapes.
  5. Insert bobby pin into top of each wreath. This will be the "hook" for the ornament. Let dry overnight.
  6. Drying wreaths.
  7. Using hole punch, punch several holes from red paper to make "berries" for wreath. Attach to wreath with glue.
  8. Make yarn bows for each wreath. Attach with glue.
Thoughts:
These wreaths are really easy to make and come out so cute. They are surprisingly sturdy once dry.

Elliott's Evaluation:
Putting the red paper on was boring, but I liked making the wreaths a lot. I liked stirring the rice and adding the food color.

Friday, December 17, 2010

Celebration Christmas Tie

Go ahead and tie one on this Christmas!


We got the inspiration for this craft from www.Disneyfamily.com as a promo for their new(ish) Christmas movie Prep and Landing. Wayne the elf wears it to celebrate his (he thinks) imminent promotion. The Disney website has a template for the Christmas tree that you can print off for those of you who are artistically challenged. (They also have side bar ads for Busty Russians who want to meet me, which I thought was highly inappropriate for a "Family" website, but let's not go there...)

What you need:
  • One sheet of green felt
  • Fabric glue
  • Embellishments (we used pom-poms and sequins)
  • Safety pin
How to:
  1. Cut tree shape out of green felt, about one foot long.
  2. Cut additional shape for "necktie" portion of tie. (Again, I suggest the template on Disney's website, but, basically it's a very thick U-shape about 1 and 1/2" in height by 4" in width.)
  3. Glue portion of felt over top part of tree, fold the ends over and glue ends down. (For those of you following my pictures, this is not the order I did it in. But you should. It will be easier to do it now so you can press down as much as you need without worrying about the embellishments on your tie.)
  4. 
    Backside of tie showing only one end glued down.
    
    Both ends glued down.
  5. Decorate tie with any embellishments you want. We used pom-poms and sequins, but you could use glitter glue, beads, ribbon, etc.
  6. Let dry and pin on.
  7. Look cool!
Thoughts:
This was so cute and very fun to make. Fabric glue and felt are not the best of friends and after trying to attach the necktie portion to the tree portion I wasn't on friendly terms with either of them. But, eventually they do dry and hold together quite well. Be generous with the glue if attaching pom-poms. Most seemed like they were hanging on by a thread. A couple of the sequins popped off after one wear, but it's an easy fix.

Elliott's Evaluation:
I wore my Christmas tie to school and my teacher's loved it. I really liked making it and I put some of my favorite colors and some of Mommy's favorite colors on it.


Monday, November 22, 2010

Clothespin Dinosaurs

Roar! I'm a scary dinosaur!
You will need:
  • Foam board
  • Paint
  • Glue
  • Glitter, sequins, etc
  • Googly eyes
  • Clothespins (2 per dinosaur)
  • Craft knife or box cutter
How to:
  1. Cut dinosaur shapes out of the foam paper using a craft knife. I say craft knife, because although cutting foam paper is pretty easy, a box cutter just doesn't make a nice edge. I was too cheap to buy a craft knife, but if you have one use it. Keep the design simple and keep it hands and legs free. (The clothespins become the arms and legs.)
  2. Paint dinosaur shapes.
  3. Once dry, decorate dinosaur with glitter, sequins and sparkles.
  4. Add googly eyes.
  5. Set clothespins in place as arms and legs. Leg clothespins should be able to stand dinosaur up.
Thoughts:
For Elliott's 3rd birthday (a dinosaur party), I had this craft set up as a "warm-up" activity for anyone who was interested, which was, surprisingly, only one child. (And him being the one who was LEAST into arts and crafts!)  Of course, I had also forgot to hide all of Elliott's toys before the party guests came over, so the boys were all a bit distracted. Elliott finished his after the party was over, but it was not the hit I thought it would be.


Elliott's friend, Jack, who really isn't in to arts and crafts really got into this project!

Elliott's Evaluation:

I don't remember making this. Did I like it? Do we still have it?

Saturday, October 30, 2010

Boa Bats


You will need:
  • Black poster board or card stock
  • One black feather boa (cut into pieces long enough to wrap twice around the bat) For us, one boa was enough to make five bats.
  • Double-sided tape
  • White paper
  • Fishing line
  • Black marker
How to:
  1. Cut a bat wing shape out of the black paper.
  2. Place a piece of double-sided tape on the body of the bat. Attach one end of the boa to the tape and wrap it around the body twice. Secure with another piece of tape.
  3. Draw eyes on white paper and attach with tape.
  4. Hang from fishing line.
Thoughts:
Geez! Who knew how messy a feather boa could be once you cut it? Feathers, feathers everywhere! The double-sided tape did not hold on to the boa very well and after a day I had to fix it with regular tape, which seems to be working much better. These are really easy and really cute.

Elliott's Evaluation:
I really liked painting the wings. (Me: Uh, we didn't paint the wings. That's black paper.) Oh. (Long pause) It's not called a boa bat; it's called a real bat because you are flying it around the kitchen like a real bat. I liked getting tickled by the feathers.

Tuesday, October 26, 2010

Light-Up Spider


A creepy, glow in the dark spider.
 You will need:
  • Egg carton (one carton will make 12 spiders)
  • Black paint
  • Hole punch
  • Black pipe cleaners (4 per spider)
  • Black duct tape
  • Battery-operated tea lights (one for each spider)
How to:
  1. Cut the cups from the egg carton. Paint the exteriors black. Let dry.
  2. Punch two eyes (front) and eight leg holes (four on each side) into each cup.
  3. 
    The cup on the left shows a side view; the one on the right a front view.
    
  4. Cut pipe cleaners in half. Insert them into each leg hole. Secure on the inside with a piece of duct tape.
  5. Set the spider on top of the tea light and secure the two pieces together with duct tape. Be sure to leave the on/off switch exposed!
  6. Bend the spider's legs to make him extra creepy.
Thoughts:
I was really looking forward to making these spiders at our Halloween party. However, (you knew that was coming) I was a little disappointed. The holes were really tough to punch. I'm either getting weak as I get older or I am in need of a new hole puncher. The tea lights and the egg cups don't quite match up. The cups were quite a bit larger than the tea lights, so it took some maneuvering with the duct tape to make it line up. Luckily, all that black just blends right in together. All of the party guests were really into making these, and we got some very interesting legs for some of our spiders. (Sorry, no pictures. I was very involved with helping everyone with their taping.) The boys couldn't wait to turn them on and there was a mad dash to the powder room to see what they looked like in the dark. Our spider is still getting some play action a week later. Totally craptastic, but very worth it.

Elliott's Evaluation:
I liked painting them. I liked putting the light in it. It's a nightlight but it's a small one because it doesn't do too much light.

Sunday, October 24, 2010

Popsicle Stick Mummies


A mummy for your Mummy's Boy or Girl
 You will need:
  • Popsicle sticks (two for each mummy you make)
  • Wooden craft spoons (Popsicle sticks with rounded ends)
  • Glue gun
  • Gauze (Our strips were 2 yards in length and 1 inch wide.)
  • Googly eyes
  • Wire cutters
How to:
  1. Use the cutters to snap two Popsicle sticks, not quite in half. (Leave one side slightly larger than the other.) The longer pieces will be the legs.
  2. Glue the arms and the legs to a wooden craft spoon to make a person. Let dry.
  3. 
    One arm and one leg make up one stick.
    
  4. Wrap gauze around sticks. Use a dab of glue to hold last piece in place.
  5. Add googly eyes.
Thoughts:
We did this craft at this year's Halloween party and it was a little more complicated (for 3 year olds) than I thought it would be. The adults had to lend a hand wrapping the gauze. However, it was also a favorite. One of our crafters now sleeps with his mummy and Elliott says it was his favorite craft from the party. They are awfully cute. So, although this craft is actually very easy, be prepared to jump in with a helping hand, and don't "bury" this craft. Haha, get it?

Elliott's Evaluation:
This was my favorite craft from our party. (Me: Even though Mummy (sorry, I'm on a roll...of gauze) had to help a lot?) Yes. I like my mummy so much. He's sooo cute. I love him.

Friday, October 22, 2010

Milk Jug Skeleton


If you are insane, make this skeleton from milk jugs!
 You will need:
  • 8 or 9 plastic gallon jugs (I only used 6, but have some back-ups.) Start saving them in September!
  • Fishing wire
  • Craft knife or scissors
  • Glue gun
  • Hole puncher
  • Glow-in-the-dark paint (optional)
  • Black marker
  • "U-shaped" sewing needle
How to:
     
  1. To make head, try to find a jug that has a pair of circular indentations opposite the handles. (Of the 9 jugs we saved, none had two. We did have one that had two grooved circles on each side. I traced the circle with a black marker and colored it in.) In the corner opposite the handle, cut a large mouth (smiling or frowning) centered under the eyes. Make two small slits at the top of the head and tie a loop of fishing wire through to hang skeleton. (I'm not sure how that is possible. Unless you make the mouth big enough to slip your hand through, there is no way to thread the line through the holes. For whatever reason I happened to have a u-shaped sewing needle...how or why I have no idea; I am NOT a sewer...I threaded the line through the eye and looped it through the other hole.)
  2. 
    Elliott holds the head and his skeleton straw that we used for inspiration.
    
  3. Chest: Draw "ribs" on a right-side up jug, opposite the handle. Cut the plastic away to form a rib cage. Hot glue gun the head and chest together by the spouts of the two jugs, which will form the neck of the skeleton. (***If you plan on painting your skeleton, hold off on any assembly for now. Paint all the pieces and once they are dry, follow assembly instructions.)
  4.  
  5. Shoulders: Cut off two jug handles, leaving a small collar on each end and attach to the chest section with the glue gun. Punch a hole at one end of each shoulder.
  6. El holds the two shoulder pieces.
  7. Hips: Cut all the way around a jug, about 4 to 5 inches from the bottom. Cut a U-shape from each of the four sides. Punch holes in two opposite corners.
  8. The hip section
  9. Waist: Cut two spouts off two jugs, leaving a collar on each. Glue spouts together at the non-collared sides. Then, hot glue the waist to the bottom of the chest and the top of the hip sections.
  10.   
    Two spouts, glued together will become the waist.
    
  11. Arms and legs: Cut eight long bones from the corner sections of three jugs. (I cut them at the curved sections.) For four of these bones, cut out a long, center piece to maker the lower limbs (forearms and shins). Punch a hole through both ends of all eight pieces. Attach to skeleton with fishing wire.
  12. 
    I'm no artist. Make eight of these shapes for the arms and legs.
    
  13. Hands and feet: Trace kid's hands and feet onto flat pieces of jugs and cut out. Attach, with fishing wire, to arms and legs.
  14. Hang and enjoy!
Thoughts:
Hands down, no competition, this is the WORST CRAFT EVER!! There is nothing kid friendly about this craft at all and poor Elliott could only look on as I cut each piece. Speaking of cutting, owwww!! My hands were so cramped up from this craft. Cutting into milk jugs is seriously hard work and your hands will suffer. (And, yes, OK, after this craft I WILL invest in a craft knife for things like this.)

We decided to paint our skeleton with glow-in-the-dark paint. (Why????) I don't recommend it. The paint we used was a very thick, gloopy type of paint that was very hard to paint on. I'm not sure if this is a characteristic of all glow-in-the-dark paints or just this brand. Either way, after hanging our skeleton outside, under a tree, he gets no sunlight during the day, and therefore does not glow in the dark at night. What a waste of time! Your skeleton, should you brave this project, will look just as good Au naturel.

Putting the skeleton together was fairly easy, but again, there wasn't much Elliott could do to help. He did, however, discover that he could drop items into the skeleton's mouth and they would fall into the chest area. He kept very busy dropping marbles and glue sticks into the mouth. Whatever floats your boat, kid.

Now that the skeleton is hanging outside, I will, begrudgingly, admit that he is pretty darn cute. Still, not a day goes by that I don't stand at the window and shoot murderous looks in his direction.


Elliott's Evaluation:
I really liked painting this. Mommy didn't like the paint. Our skeleton is hanging on our tree. We wrapped the string around the tree so it won't blow away.


Monday, October 18, 2010

Hatching Spider's Nest

Eeks! Spiders!


You will need:
  • Glue, glue and more glue (We used 2 bottles!)
  • 2 bowls
  • Balloon
  • Cheesecloth or gauze, cut into 12 (or so) 3x18 inch strips
  • Fishing line
  • Plastic spiders (I used a bag of spider rings from the Dollar Store and snipped the ring portion off most of the spiders with scissors.)
  • Sewing needle
How to:
  1. Empty glue bottle into a small bowl and dilute with water. Stir well. (I suggest emptying about a quarter of the bottle at a time.)
  2. Inflate balloon and set inside other bowl to give you a stable working space.
  3. Dip the strips of cloth into glue mixture and gently squeeze out excess. Spread strips flat over the surface of the balloon, leaving a few small gaps and an opening near the top of the balloon.
  4. 
    From the look E's face you would think this wasn't fun!
    
  5. Let glue dry (overnight), occasionally rotating the balloon to speed of the drying process.
  6. Pop the balloon and remove.
  7. Use sewing needle to thread a piece of fishing line at top of nest to make a hanging hook. (Knotting one end of the line should anchor it to the inside of the nest. I used gauze and found I needed two knots to hold the line in place.)
  8. Thread more line through nest and tie several spiders on to pieces. Have some spiders poke out of gaps in cloth. If using spider rings, keep some intact. I snipped a small slit in some spots on the nest and tucked the ring portion through the cloth to hold the spider in place.

Stock up on glue.
Thoughts:
This is a really neat Halloween decoration! But holy cow, does it ever use a lot of glue! We went through one full bottle and two half bottles. The cloth just soaks the glue right up. The coolest part of this craft? The awesome sound the deflating balloon made as it was pulling away from the gauze. It sounded like fireworks!

Attaching the spiders to the line was not a kid friendly activity, but I had Elliott sort the spiders for me (by color and by those who had the ring portion cut off) and it kept him involved. This was a fun one and the final result is really cute.

Elliott's Evaluation:
I like all the spiders hanging from the strings. I liked putting the cloth on the balloon. We have our nest in the kitchen so we can see it.

Monday, October 11, 2010

Haunted Playhouse


Ghosts frolic in this haunted house!


You will need:
  • Cardboard box (or boxes, depending on how detailed you plan on getting)
  • Paint
  • Box cutter
  • Glue
  • Markers
  • Any scraps that you want to use for decorating your house
  • Duct tape
How to:
  1. Figure out how your house will stand and cut out what will be the back side of the house. Save for shutters, roof, extra floor, etc.
  2.  
  3. Cut out windows and doors (leaving part of the door uncut so that it will open and close)
  4. 
    When making the doors, be sure to keep part of the doors attached to the box so they'll open and close.
    
  5. Paint box. You can use any color. Since we were doing a haunted house we used black and dark green.
  6. 
  7. Using the extra cardboard, make whatever features you want to add to your house. We made shutters, a roof and a second floor. To hold the second floor in place, I cut two slats on the sides of the house and slid a long piece of cardboard through both. This held up much better than taping it would have.
  8. 
     
    We created a sturdy second floor by sliding a piece of cardboard through two slats on each side of the box. I added "bricks" to the floor since I wasn't allowed to paint it.
    
    We added a second floor and an attic to our house.
    
  9. Once dry, tape any open box flaps closed; Glue on any decorations.
Thoughts:

The nice thing about this craft is you can go as simple or as elaborate as you want. If I had some major talent, I would've added some curtains, artwork and some kind of furniture to our house, but our attic feature was about as fancy as I could do. Elliott and I had fun trying to figure out what we would add to our house. (Shutters were OK on the front windows, but not welcome on the sides. Painting the inside of the house was alright as long as we didn't paint the second story floor.)

The residents of our house? The ghost sculptures and (surprise!) some Star Wars characters who like to live in the attic.

Elliott's Evaluation:
I only liked painting it. (Me: You didn't enjoy making this? Why?) I liked making it, but I only liked painting it because Mommy had to do the putting together part. I like playing with it. My ghosts like it.