Pages

Showing posts with label glitter. Show all posts

Thursday, April 26, 2012

Calm Down Jar

Our version of The Calm Down Jar

I've been seeing the Time Out Jar a lot online recently and I thought it was a great idea, with one problem: it's fun! Time Outs in our house are a punishment, so why would I give my son something cool to play with while he's in trouble? Kind of defeats the purpose. So I altered it a bit to become known as the Calm Down Jar.

You know how you kid is kind of being a pest, but isn't exactly being bad? Or maybe he is bouncing off the walls and you just need him to chill out for five minutes? (Just imagining here, of course.) You know he doesn't deserve a Time-Out, but oh my gawd just give me two minutes to finish these dishes before you decide it's time for me to build another freaking Lego set!!!! Well, shake this bad boy up and tell them they have to sit still until all the glitter has floated to the bottom. Voila! A calmed down child!


You will need:
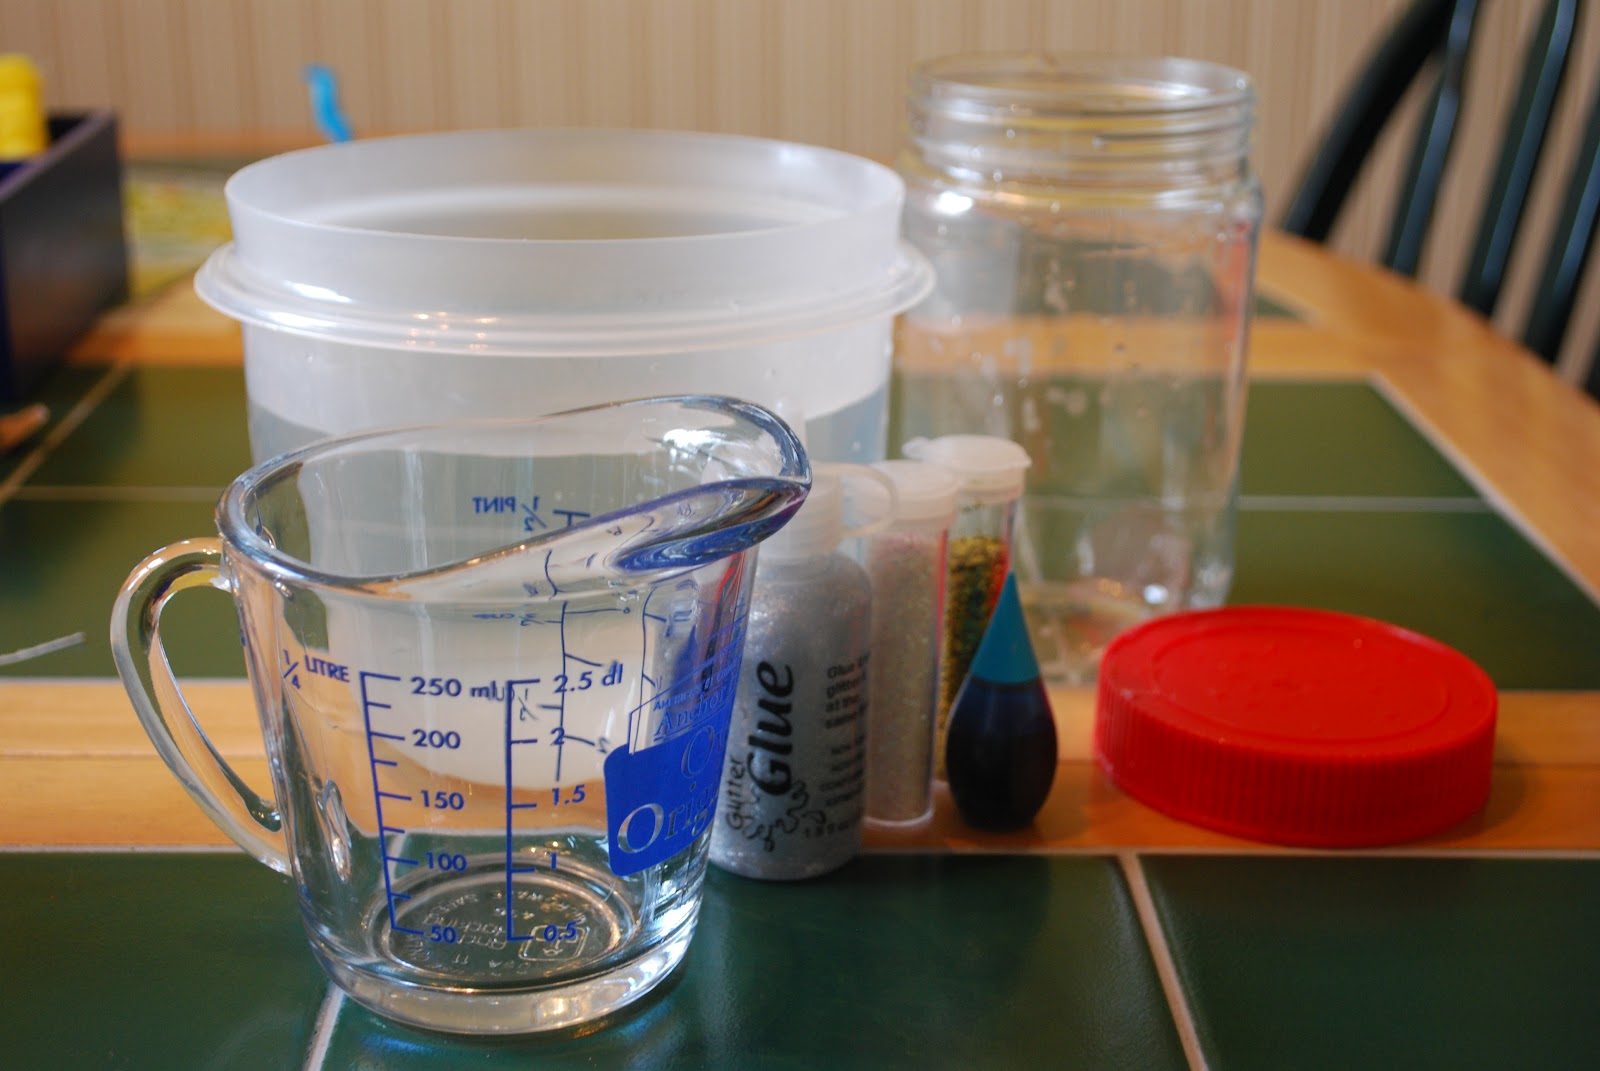

  • A jar with tight fitting lid (We used a plastic peanut butter jar.)
  • Glitter glue
  • Glitter
  • Food color
  • Water

How to:
  1. Fill jar with hot water. (The warmth helps to break up the glue.)
  2. Add glitter glue. (If you choose to make this a time out jar, there is some kind of ratio to make it last a certain amount of time. I think it may be 1 cup water to 1 tablespoon glue equals one minute of glitter floating. We did not follow any measurements and just added as much as we wanted.)
  3. Add some glitter. (Again, we just shook until we stopped.)
  4. Add food color a drop at a time until you get the color you want.
  5. Place lid on tightly and ensure seal before shaking! (Oops!)
  6. Enjoy!
Thoughts:
OK, I'll admit this isn't as cool as I'd like it to be. I was expecting it to be a bit more "floaty". Maybe we colored the water a bit too dark because the glitter doesn't stand out as much as I'd like it to. But still, as a craft it was fun to make and it really does work. Elliott actually likes when I pull it down (I keep it on top of the fridge so it doesn't lose its appeal too quickly.) and hand it to him. He knows to sit at the table and give the jar a good shake.

Elliott's Evaluation:
 "So, how I made this is I just put blue food coloring in it. Then I put sparkles all in it. Then I put a lid on it. It is good."
Woah! Not sure what's up with the overly excited face there!

Friday, June 17, 2011

Snow Globe


You will need:
  • Small jar with tight fitting lid
  • Small action figure
  • Star shaped confetti
  • Glitter
  • Distilled water
  • Clear, liquid dish soap
  • Bottle caps
  • Hot glue/gun
  • Plumber's tape (optional)
How to:
  1. Most likely, your action figure will need to be raised slightly in order to be seen in the jar. Hot glue one or two bottle caps (check to see which shows the action figure better) to the inside of the lid.
  2. Hot glue the action figure to the cap(s).
  3. Fill the jar almost full with distilled water. Add a squirt of dish soap.
  4. Add a handful of confetti and lots and lots of glitter!
  5. If you have plumber's tape, wrap it around the grooves of the jar. Carefully place lid on to jar and tighten. Flip over, get wet.
Thoughts:
Oh, my, so craptastic. Where to begin with this one? Originally I saw this idea in the Star Wars Craft Book by the amazingly cool Bonnie Burton and it suggested using baby food jars. I, however could not find action figures small enough to fit inside baby food jars so I bought the next smallest size I could find at the Dollar Store. (You get what you pay for sometimes!)

I bought the smallest action figures I could find, the little short, squatty ones that are really popular right now and they fit great, except for the characters holding guns, which scraped against the sides of the jar as we were screwing the lids back on, which in turn would pop the figures right off the bottle caps. Oh, and let's mention that the slightest little jostle (or prying finger) would also pop a bottle cap off. I had the glue gun ready to go at the party!

I had the Younglings sit in a semi circle in front of me and we made the snow globes assembly line style. (I had glued the action figures to the jar lids beforehand to save some time and prevent curious hands from grabbing the glue gun!) I have to say, the kids loved putting these together. You could've heard a cricket chirp while they made them. Everyone got to choose the action figure they wanted and add as much glitter and confetti as they wished.

Now let's flip them over and watch!
Uhhh, is yours leaking?
Maybe that lid isn't on tight enough.
Oh, wait. Mine is leaking too.
Oh for Pete's sake.
Craft...fail.
Hey everyone, when you get home open up your snow globe and you have a new action figure! Yay!

I did later try the plumber's tape on Elliott's jar, but it still leaked. I thought about trying to hot glue the lid to the jar, but I figured El would eventually want the action figure out of it and knowing my luck, that would've been the one seal that actually worked and we'd never be able to get it back open. So, we gave up on it and have a new action figure.

Still, like I said, the kids really enjoyed this. Figure out what you can do to improve on it and go for it.

Youngling Padawans show me what they think of the leaky snow globes!

Elliott's Evaluation:
Mom, you weren't supposed to do any of it without me! (He's talking about the fact that I glued the bottle caps and action figures on to the lids before the party.) I really liked putting all that glitter in there. This was fun, very fun.

Saturday, June 11, 2011

Jedi Light Sabers

Make homemade Jedi Light Sabers
You will need:
  • A long tube of some kind. I was planning on using the tube from wrapping paper, but scored baseball bat Wii controllers at the Dollar Store for 2 for $1!
  • Paint
  • Glitter
  • Black and silver duct tape
  • Paint brush
How to:
  1. Paint 3/4 of your tube in the color of your choice.
  2. While paint is still wet sprinkle with glitter, the more the better!
  3. Once paint is dry, wrap the bottom four inches or so in silver duct tape.
  4. Wrap remaining space between silver and painted area with black duct tape.
  5. Fight the Empire!
Thoughts:
All hail the Dollar Store! I spotted these Wii Baseball bat remote holders at a steal for 2 for $1! And an even better deal: the remote holder actually snaps off from the "bat" portion, making assembly even easier for us. However, if you can't find these yourself, the inner tube from a roll of wrapping paper would work just fine. (And would be a little more gentle.)

These were so easy to make. During battle, uh, I mean, playtime the paint chipped off from the light sabers, but no one seemed to care. This became one of the favors for Elliott's birthday party, as well as the weapon of choice for destroying the Death Star pinata. (See previous post.)

Elliott's Evaluation:
Fun! Painting it was fun. I like that they have glitter all over them. I liked putting the glitter on.

Monday, November 22, 2010

Clothespin Dinosaurs

Roar! I'm a scary dinosaur!
You will need:
  • Foam board
  • Paint
  • Glue
  • Glitter, sequins, etc
  • Googly eyes
  • Clothespins (2 per dinosaur)
  • Craft knife or box cutter
How to:
  1. Cut dinosaur shapes out of the foam paper using a craft knife. I say craft knife, because although cutting foam paper is pretty easy, a box cutter just doesn't make a nice edge. I was too cheap to buy a craft knife, but if you have one use it. Keep the design simple and keep it hands and legs free. (The clothespins become the arms and legs.)
  2. Paint dinosaur shapes.
  3. Once dry, decorate dinosaur with glitter, sequins and sparkles.
  4. Add googly eyes.
  5. Set clothespins in place as arms and legs. Leg clothespins should be able to stand dinosaur up.
Thoughts:
For Elliott's 3rd birthday (a dinosaur party), I had this craft set up as a "warm-up" activity for anyone who was interested, which was, surprisingly, only one child. (And him being the one who was LEAST into arts and crafts!)  Of course, I had also forgot to hide all of Elliott's toys before the party guests came over, so the boys were all a bit distracted. Elliott finished his after the party was over, but it was not the hit I thought it would be.


Elliott's friend, Jack, who really isn't in to arts and crafts really got into this project!

Elliott's Evaluation:

I don't remember making this. Did I like it? Do we still have it?

Saturday, May 29, 2010

Sparkly Snowflakes

Christmas ornaments so easy a 2 year can (and did) make them.


You will need:
  • Popsicle sticks
  • Glitter
  • Sparkly sequins
  • Ribbon, cut into 4-inch strips
  • Glue
  • Glue gun* (optional)


How to:
  1. For each snowflake use four popsicle sticks. I found it easiest to make two "X"s with two sticks and then layer each "X" on top of one another in a star pattern.
  2. Let dry completely.
  3. Spread glue on to each snowflake.
  4. Sprinkle generously with glitter.
  5. Add dabs of glue and press sequins on.
  6. Using glue gun (or glue) attach ribbon on to back side of ornament in a loop.


Thoughts:
My sister started our family tradition of our boys making Christmas ornaments for family members each year and it has become the gift I most look forward to each year. If you choose to start a tradition like this, be sure to enclose a picture of your child making or holding the finished product.


This sparkly snowflake was Elliott's 2009 ornament.


Anything involving shaking a big bottle of glitter will be a huge success in this house and this ornament was no exception. However, the real fun in this craft was apparently in upturning the bag-o-sequins. Over. And. Over. For those of you wondering, picking up sequins is ever so fun. Our sequins have made multiple appearances for different crafts and pouring them on to the floor is par for the course. I don't even bat an eye anymore and I'm no longer above vacuuming the stray suckers right up.

*Notes:
I hesitated to suggest using a glue gun with this craft after seeing one of my husband's co-worker's hands from a hot glue gun accident. Seriously, layers of skin gone. Layers! (Google it to see just how severe these burns can be!) However, I did find that attaching the ribbon loop to the ornament just worked better using a glue gun. If you choose to use one, use caution, especially with little ones. I won't let the boy near my glue gun.

Friday, May 14, 2010

Indoor Fireworks

A very easy project to celebrate patriotic holidays.

You will need:
  • Pipe cleaners (any colors will do)
  • Glue
  • Glitter
  • Thread

How to:
  1. Dip the ends of pipe cleaners into glue and then into glitter.
  2. Twist one pipe cleaner around the middle of the others to cinch them together.
  3. Fan out to make "fireworks".
  4. Loop thread around one end and hang.
  5. Repeat the phrases "Oooh" and "Ahhh" over and over.
Thoughts:
A pretty quick craft. I think it took longer to try to sort out red, white and blue pipe cleaners than to actually complete the project. Elliott enjoyed dipping the ends into glitter. (Helloooo! It's glitter.) But he lost interest in shaping them. Still: easy, cheap and done in a jiff. Not to mention El loved seeing them hanging around the house.

Thursday, April 29, 2010

Tissue Paper Mural

Wondering about my blog name? This artwork is a prime example of craptastic!

You will need:
  • Cardstock or construction paper
  • Tissue paper (or construction paper) in different colors, torn into pieces
  • Glue
  • Paintbrush
How to:

  1. Water down the glue slightly.
  2. With the paintbrush, "paint" the glue mixture onto paper.
  3. Place tissue paper wherever!


Thoughts: I was soooo disappointed with how this art turned out:


But, seriously, what was I thinking it would look like?  Apparently I was picturing this amazing , frame-worthy, 3-dimensional sculpture. Uh, not so much. So, here's the point: Elliott loved tearing apart the paper, mixing the glue and water and especially painting the glue mixture onto the paper. Placing the tissue paper lovingly and thoughtfully in artfully arranged scenes was supposedly not on the menu. After patting, OK, slamming a few pieces on, he called it a day. Would I do it again? In a heartbeat. Do I have this "art" framed anywhere in the house? Uh, no.

Optional: Want to make it more craptastic? Before the glue dries, add glitter, pom poms and googly eyes.

Want to be rid of the artwork but not throw it away? Crop the art, being sure to include any parts with googly eyes and add sayings like "Eye hope you're feeling better", or "Eye am thinking of you", etc. Fold paper in half and send to that unsuspecting relative who won't have the heart to throw away any of Junior's art. Suckers.