Pages

Showing posts with label dinosaurs. Show all posts

Sunday, February 20, 2011

Dinosaur Terrariums


You will need:

  • Small glass bowls
  • Rocks
  • Potting soil
  • Small plant
  • Plastic animals (We used the dinosaurs from our Treasure Stone craft.)
  • Twine (optional)
How to:
In a small bowl, place one layer of rocks (for drainage). Top with potting soil. Place small plant in soil. Decorate with a couple more rocks and plastic animals. Wrap twine around bowl.

Thoughts:
When planning Elliott's Dinosaur party, this was that one craft that I kept in the "maybe" pile. Elliott, however, had other plans. We. Were. Doing. This. Craft. What a hit! Every party-goer LOVED doing this. Who would've thought?

I really wanted to find some cacti plants for this, but cacti, in Pennsylvania, in the Spring don't mix. After weeks of looking, I finally found some at Home Depot for $7 each! Um, no thank you. Luckily, we had planted some Basil seeds that were going berserk in their pot, so I was able to transplant several smaller plants from that. Plus, does anything smell better than basil and potting soil? It was a win-win for me.

Our little terrarium sat on our deck table as a centerpiece all summer.

Elliott's Evaluation:
I loved this! I liked putting the rocks in. And the dinosaurs in. And I liked putting the plant in and the dirt in.

Saturday, February 12, 2011

Treasure Stones


Encourage your budding Paleontologist with these cool fossil stones!
 You will need:
  • 1 cup flour
  • 1 cup used coffee grounds (set out overnight to dry)
  • 1/2 cup salt
  • 1/4 cup sand
  • 3/4 cup water
  • Small toys (We used small, plastic dinosaurs.)
  • "Tools" to break open stones. (We used toothbrushes and wooden craft spoons.)
Recipe makes 4 stones.


How to:
  1. In a medium sized bowl, combine all the dry ingredients. Slowly add water, stirring until the mixture forms a dough.
  2. Roll a piece of the dough into a ball about the size of a baseball. Use your finger to bore a hole to the center, push in small toy, then seal hole back up with more dough.
  3. Repeat with remaining dough.
  4. Place stones on baking sheet and cook for 40 minutes at 170 degrees. Let cool before breaking open.

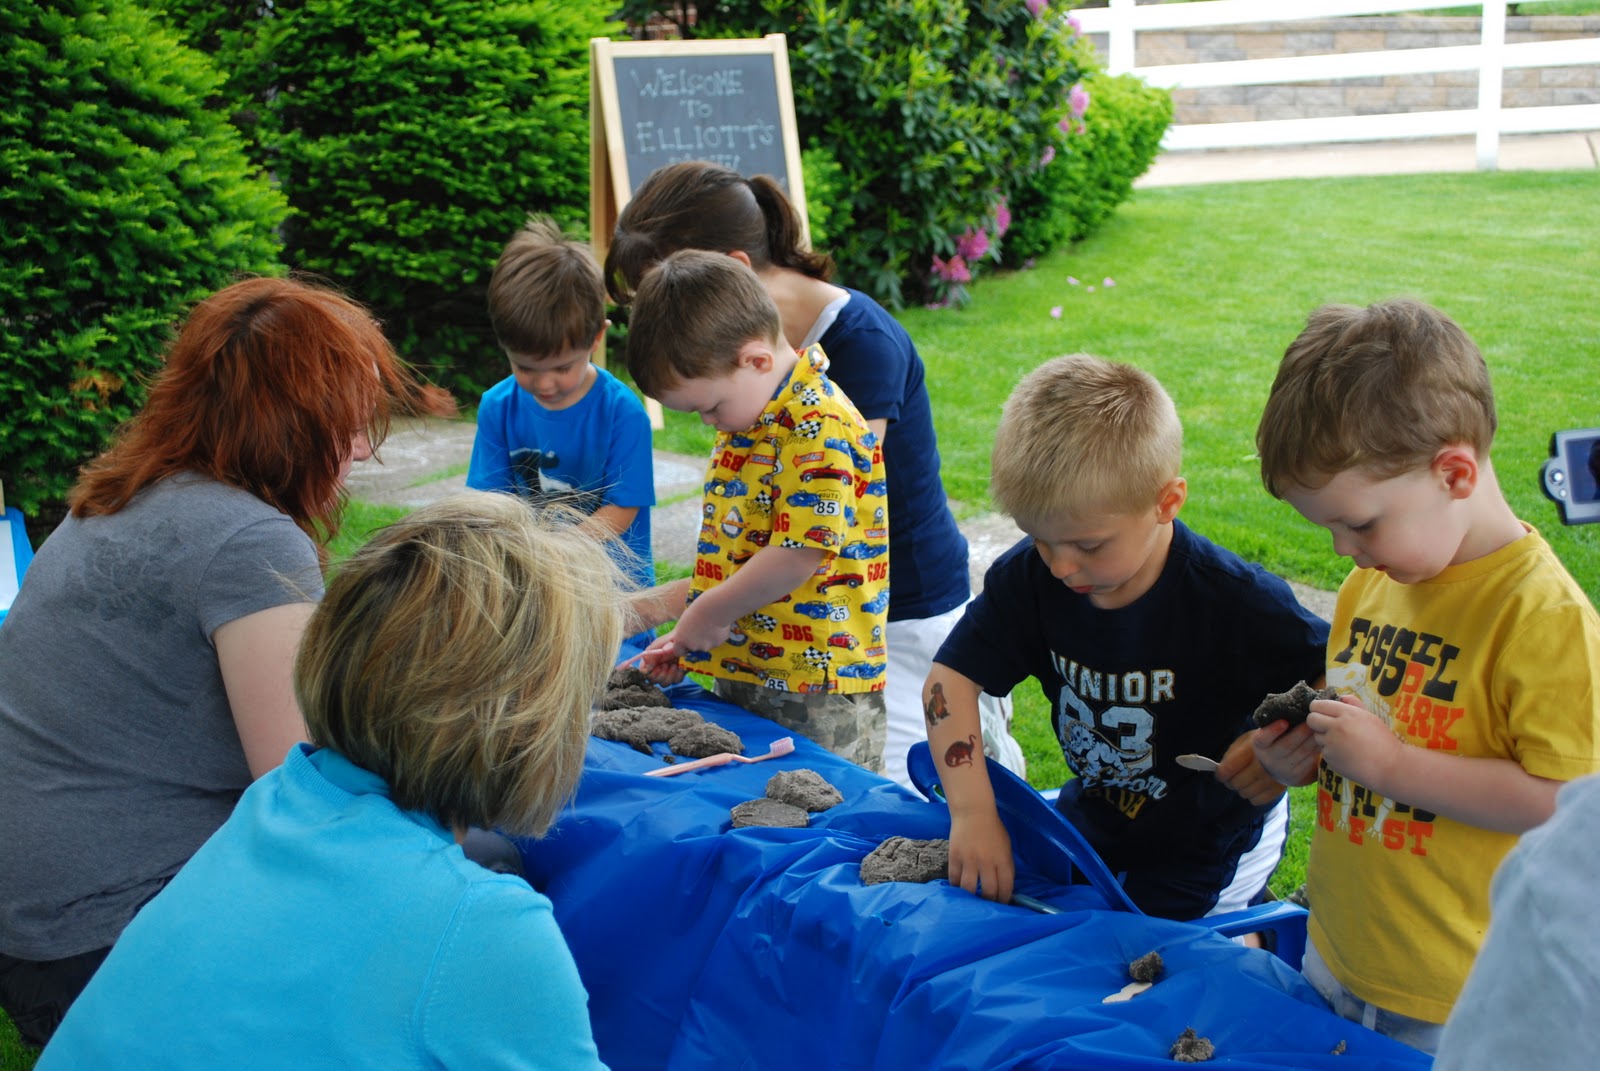
Assembly line of dinosaur hunters

Thoughts:
I found this craft in Family Fun magazine and it was one of the crafts from Elliott's 3rd birthday. (Dinosaur party.) I ended up making several batches of it because I wanted each child to have two stones to break open and because the dinosaur figures proved a bit difficult to cover with all their long tails and necks.


These were so easy and really fun to make. The recipe is perfect for young kids to help with. I was very nervous about putting plastic in the oven (!!!) and even did some searching on the Internet before I got the guts to do it. But, no problems. The temperature of the oven was actually so low, that the baking sheet probably could have been picked up without a pot holder. (But, DUH, don't try that!)


I stored the stones in plastic bags for about 2 weeks before the party and they held up well, but I do suggest a dry spot to store them. Humidity seemed to make them a tad moist. Besides looking pretty foul, (I think the party-goers thought they were digging through dino-poo.) the boys sort-of loved breaking them open. (Again, the poo look made them a bit wary.)

Really cool project!

Connor totally "dug" it!

Christian wouldn't touch it with his bare hands!


Elliott's Evaluation:
There were dinosaurs inside! They were kind of hard to open. We used toothbrushes to brush the dirt off our dinosaurs. I don't brush my teeth with that toothbrush. Do we still have those dinosaurs? Let's have another dinosaur party and do all those crafts again.


Monday, November 22, 2010

Clothespin Dinosaurs

Roar! I'm a scary dinosaur!
You will need:
  • Foam board
  • Paint
  • Glue
  • Glitter, sequins, etc
  • Googly eyes
  • Clothespins (2 per dinosaur)
  • Craft knife or box cutter
How to:
  1. Cut dinosaur shapes out of the foam paper using a craft knife. I say craft knife, because although cutting foam paper is pretty easy, a box cutter just doesn't make a nice edge. I was too cheap to buy a craft knife, but if you have one use it. Keep the design simple and keep it hands and legs free. (The clothespins become the arms and legs.)
  2. Paint dinosaur shapes.
  3. Once dry, decorate dinosaur with glitter, sequins and sparkles.
  4. Add googly eyes.
  5. Set clothespins in place as arms and legs. Leg clothespins should be able to stand dinosaur up.
Thoughts:
For Elliott's 3rd birthday (a dinosaur party), I had this craft set up as a "warm-up" activity for anyone who was interested, which was, surprisingly, only one child. (And him being the one who was LEAST into arts and crafts!)  Of course, I had also forgot to hide all of Elliott's toys before the party guests came over, so the boys were all a bit distracted. Elliott finished his after the party was over, but it was not the hit I thought it would be.


Elliott's friend, Jack, who really isn't in to arts and crafts really got into this project!

Elliott's Evaluation:

I don't remember making this. Did I like it? Do we still have it?